SOLVED: How to fix fan error – Lenovo ThinkPad 410
Posted on
Lenovo t410 fan error is a well-known producing high-quality error company, reasonably priced laptops. With their computers, they appear to have covered almost every market category.
You may come into a lot of challenges at times. Some are complicated, while others are straightforward.
1. If you can get into your laptop, feel around the top (on the keyboard) and bottom to see any hot places where the processor might be.
You may find the processor by looking for the laptops exhaust vents. It should not be too far distant from the processor.
2. Check your temperatures with a temperature monitoring app like HWMonitor, HWiNFO, Speefan, or Realtemp. After booting into GUI, you should be in the mid 30°C range (depending on the ambient air temperature in your room).
3. If you can view and hear the fan spinning/rotating the apps and startup page yet both say you have a fan fault, you’ll need to upgrade your BIOS. You’ll need to check Lenovo’s support site for your model number to see if any BIOS upgrades are available.
4. If you can hear the fan spinning (but no airflow from the vents), but the laptop is steadily heating up after booting into GUI, your cooling system is failing.
5. Disassemble the laptop and inspect the fan and cooling fins stack to see if they’ve been blocked with dirt/debris and hair follicles. If the fins stack and fan are clogged, use a miniature soft bristles painters brush to remove the debris.
6. The fan has died if the cooling assembly is clean, but the fan isn’t moving. You’ll need to get a similar/matching replacement part from eBay or Aliexpress to replace it.
7. After removing the previously (factory) applied thermal paste with isopropyl alcohol, reinstall the thermal paste while reassembling the cooling assembly. Instead of rubbing alcohol, you can use nail paint remover. Arctic Silver 5 or Arctic MX-4 thermal paste can be used.
8. If the fan problem persists, you’ll need to restart your laptop. Replace the battery, reconnect to the AC adapter, and pull up by holding down the power button for 30 seconds.
9. If your Lenovo laptop has an internal battery, you should be able to find a reset hole on the bottom of the notebook. Use a straightened paper clip to drive down and hold the button for 30 seconds while removed from the AC power adapter.
Release the laptop and then turn it on. Hopefully, you and your laptop are no longer bothered by the fan problem warning, and you may resume your work on your Lenovo laptop.
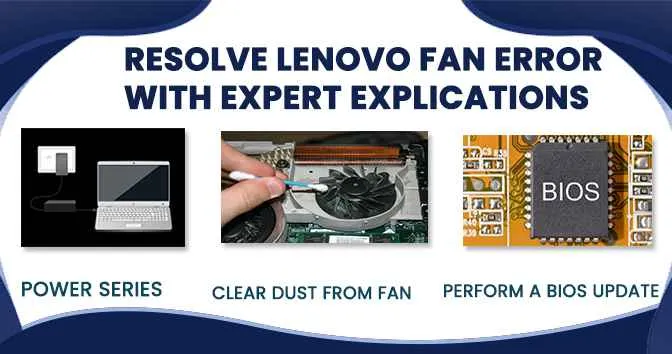
Resolve Lenovo Fan Error with Expert Explications
Lenovo is a great laptop brand, particularly among small businesses. However, it can be aggravating to power on your laptop and see Lenovo fan error rather of the Home screen.
If you find the “Fan Error on a Black Screen” after pressing the Enter key, advance showing the job. This page contains all of the necessary information to resolve the issue.
If you’re having trouble with this problem, try the solutions listed on this page. A BIOS malfunction could cause a fan problem on your Lenovo laptop.
Fixing the “Lenovo Thinkpad Fan Error” Problem There are a few approaches you force take to tackle the problem.
Solution 1: Power Series
Run a control cycle on your laptop to fix the Lenovo laptop fan issue. If a high-temperature effect causes the error, this is the easiest and most effective resolution.
If you use your laptop for an extended period without using a cooling fan, you may experience overheating. So, follow the steps below to attempt this solution:
To begin, abruptly shut down your laptop by pushing and holding the Power button for around 30 seconds. If your computer is attached to electrical support, turn off the power source after that.
Push the power adapter next. To remove the spare battery power on your laptop, press and press the Power button. You must wait until the temperature of the computer returns to normal.
Put your laptop back into charging mode when the temperature drops sufficiently. After that, restart the device to see if the problem has been resolved. If not, continue to the next step to determine the fan problem.
This is how to fix an IBM ThinkPad fan error, which you may fix by following these steps:
Before continuing with this procedure of resolving the error, make sure your computer is turned off. Additionally, no power should be retained on your PC.
Open your laptop’s battery cover, which is located in the upper right corner.
Next, open the laptop’s keyboard part with a tong. After that, loosen and remove the left-hand sidebar to gain access to the laptop’s fan error.
Remove the needed fittings to separate the fan from your device. Dip a delicate cloth into the ethyl alcohol.
The dirt on the laptop and the fan unit can be cleaned with an alcohol-soaked towel. Remove any leftover dust particles from the laptop fan with a brush.
Reassemble the laptop correctly after the dust has been removed. Rn on your gadget and see whether the fan turns on. Hopefully, you will not get the lenovo t410 fan error problem this time. Otherwise, you’ll need to upgrade your laptop’s BIOS to fix the problem.
Correctly. So, if you want to do it on your own, follow the directions below.
To begin, go to Lenovo’s official website and choose your device from the Product Window.
Then, in the “Select Series” section, type the product series.
After you’ve done this, you’ll most likely want to do something else.
By completing this activity, you will be ready to resolve the problem.
These are the most effective instructions for resolving the Lenovo fan problem. Try each one until you’ve solved the problem and can use the device without the error message.


![McAfee blocking Google Chrome Error [SOLVED]](https://www.pcsupremo.com/blog/wp-content/uploads/2021/09/McAfee-blocking-Google-Chrome-Error-min.jpg "McAfee blocking Google Chrome Error [SOLVED]")
 Norton Antivirus won't install on windows 10")
![[Solved] : What is Avast WiFi Inspector? Activities, Notifications & Solutions](https://www.pcsupremo.com/blog/wp-content/uploads/2022/01/solved.jpg "[Solved] : What is Avast WiFi Inspector? Activities, Notifications & Solutions")